Showing posts with label food. Show all posts

15 July 2013

A Bowl of Cherries


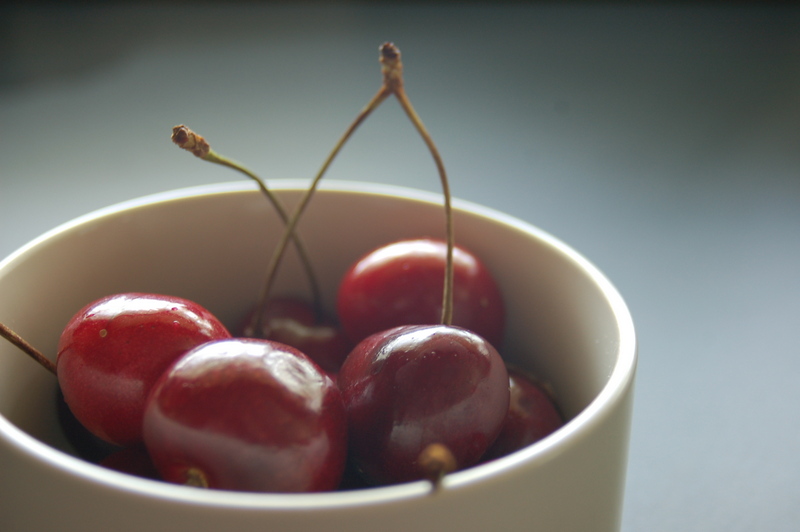
It's July, which means Cherry Season!  This week, I finally bought myself a cherry-pitter.  Every year I buy a bag of cherries because in July they are just too hard to resist, but I rarely eat the entire bag because the task of pitting (or spitting) makes me tire of them before they rot. So, every year I vow to just go ahead and get myself a cherry-pitter, even if it is a uni-tasker, but then cherries are gone from the store just as quickly as they appeared, and I forget about the pitters until the next year.


Browned-Butter Cherry Bars: Before
Browned-Butter Cherry Bars: After
Few recipes for cherry desserts truly require the sweet dark cherries in your markets now.  They need the bright sour cherries I remember picking in Southwest Lower Michigan in the summers of my youth.  Sweet cherries are best eaten out of hand, but I really wanted to craft something with them.  This summer, I've purchased or been given three times as many cherries as I have ever purchased in summers past.  Mostly a sweet purple-fingered happy accident, but the shiny new cherry-pitter sure does justify the purchase.  Anyhow, as such, I have made a couple great cherry desserts in the past couple weeks.  First, roasted sweet cherries in an amaretto sauce1 which made for a fantastic fresh yogurt topping.  Next, a browned-butter cherry bar2, which was sort of a more accessible cherry clafouti, but was a much more sophisticated version of my favorite cake growing up, my mom/grandma's cherry surprise cake, made with canned cherry pie filling.  Side note: I could eat an entire can of that luscious red cherry goo in one sitting.  Seriously, it's one of my favorite foods on the planet, and I have no shame in saying that.

So, back to fresh cherries.  Our supermarket had them on sale again this week, so I bought myself about a pound.  They're definitely getting on in the season, because these don't look nearly as beautiful as the pound I bought just two weeks ago.  Seasonal eating is the joy of reappearance swiftly followed by the growing sadness that the season's close is coming.  Dramatic, perhaps, but it is a bigger metaphor.

Anyhow.  Cherries.


I had one frozen pie crust from a quiche adventure last week.  But only one.  Cherry pie is very nearly always a two-crust operation; lattice top at the very least.  And I was not in the mood for making my own pie crust.  Most days I don't have the patience to cut butter for pie crust.  It's the one thing in the kitchen (well, besides washing the dishes!) that holds virtually no appeal to me.  Besides, my pitted cherries were beginning to oxidize and I wanted to make quicker work of them than all that chilling and cutting and rolling was going to take.  So I switched gears to cherry cobblers and crumbles.  Fruit on the bottom, crustiness on top.  Fine, but I still had that pie crust in my freezer begging to be used.  Which means hybrid!

I took the filling from this two-crust pie recipe but punched up the almond extract, because almond extract.  Oops, as it's in the oven right now, I just realized I forgot the little scattered butter bits.  Oh well.

I plopped it in my frozen pie crust, and crowned it with half of this recipe's oat crumble topping.

Cherry CrumblePie: Before

Cherry CrumblePie: Before

And now, world, I present to you Cherry CrumblePie.  Which sounds charmingly like humble pie.  Probably tastes better.

Cherry CrumblePie: After.  I like how the crumble stayed in little pearl-pellety pieces, as opposed to flattening out across the top or else sitting like sawdust.  Maybe melted butter is the key.

I poked a fork into the liquid on the edge to make sure the cornstarch had adequately done what it was invited to do - success!  Also, tastes good and cherry-almondy!

Don't judge; the first piece out of the pan is always the ugliest.  Still tastes delicious!


---
1  I used lemon zest in place of orange and an Amaretto/water mixture in place of the wine. Marvelous!

2  The recipe I found, is actually an adaptation of this one, which is itself an adaptation of this one.  Which illustrates the evolution of a recipe as each cook puts his or her own signature on it.  So lovely to actually trace the etymology, as it were, which is so often lost.

Also makes me wonder, is molecular gastronomy the only truly new recipes we have right now?  Is most home cooking, as we know it now, just a series of adaptations?  I suppose one could argue that some of what the food physicists are doing isn't even new.

15 February 2013

Lent [Day 3]: Granola

Draft originally begun April 2012 and inexplicably unpublished.  
Made another batch of this just today, with pecans, pictured.

So I've been eating yogurt virtually every day - not my own so often these days, but I have found a few favorites.  I had some leftover vanilla-almond granola from a bread project, which I sprinkled onto some vanilla yogurt, what a delight of textures!

Only thing is granola is crazy-expensive, and one box I bought smelled a lot like that weird vanilla scent of play-doh.  But I have a ton of oats at home, so why don't I make some?  Going to my standby, I found a Cooks Illustrated recipe for almond-fruit granola.  But of course I couldn't leave well enough alone.

I didn't have enough maple syrup, so I substituted honey, and replaced a tablespoon of brown sugar with maple sugar.  Swapped the almonds for macadamias, and chopped up some banana chips to blend with it.

It didn't need nearly 40 minutes - I took it out at 29.

1/3 c. brown sugar (minus 1 T.)
1 T. maple sugar
1/3 c. honey
1 1/2 T. vanilla
1/2 c. oil

4 1/4 c. rolled oats
3/4 c. wheat germ
2 c. chopped macadamia nuts
2 c. chopped banana chips


Whisk sugars, honey, vanilla together in a large bowl.  Whisk in oil.  Pour in oats, wheat germ, and macadamias, and stir to coat well.  


Pour into baking sheet (line with parchment if you don't have a nonstick sheet), then use a large spatula to press the granola into the pan.  

Bake at 325 degF for 30-40 min or until golden.  Don't overbake or it will taste scorched.  Cool on a wire rack for an hour, then break up the granola into chunks.  Stir in banana chips.  Store in an airtight container.  Enjoy over yogurt. :)

01 April 2012

A little Italy

No deep-dish, Chicago-style pizza around here?  Not a problem.


30 March 2012

Metacookies

That's right - it's a cookie, inside a cookie.  Because sometimes lilies just need gilding.


Admittedly, if I were to do this again1, I'd swap out half (or maybe all) the butter in the chocolate-chip-cookie recipe for shortening.  Because they spread a little too much.  Shortening would have prevented that.


1  next time I happen to have any leftover oreos from a cookies-and-cream ice cream project

21 February 2012

President's Day

Brian and I both had the day off today, which was good, because he managed to get tickets to a taping of "Live With Kelly" (formerly Regis & Kelly).  Yeah yeah, I know, a taping of a live show...?  But if they were to actually show it live from Hawaii, it would have to start at 4am.  Anyhow, it was at the new Disney resort over at Ko Olina, which we've driven past but never been to.  It was windy and sunny day - and I forgot the sunscreen I specifically put out on the kitchen counter... I don't seem too burned, at least yet.  The episode airs Wednesday, with Carrie-Ann Inaba, Patricia Heaton, and Carson Kressly.  And a couple who won a wedding here in Hawaii with 30 friends and family - and quite possibly the least enthused to have won such a prize.  Very curious.  Anyhow.

 Aulani resort
 Paddle dancers
 Kelly and Carrie-Ann
 With Patricia
With Carson


We got home and I did some cooking, including some Butter Mochi.  The reviews of a recipe suggested making it in cupcake pans because the outside part is the best part.  And so I made miniature mochi bites!   

Mochi requires rice flour like this Mochiko:

I took about half the mixture and blended a few spoonsful of cocoa for cocoa-haupia-style mochi.

Half the recipe made four pans of mini-muffin-shaped mochi bites. 

They're reasonably good - they have that unique mochi chewiness, but with the richness of eggs and butter. I've been told they will taste better on day 2.  So, I'll try to report back. :)

20 February 2012

Mint Chip Goodness


I've been enjoying a kitchen renaissance lately, with my luxurious free time.  Good for the soul, bad for the waistline...

Last week, I made some mint-chip cookies (sorry for the lame photo - I didn't take any until I only had one left. :) Forgive also the crummy photo quality - the kitchen's a wreck, and I want to get back into the habit of posting.)  Anyhow, it was everything I love about mint-chip ice cream, my favorite ice cream flavor, in cookie form!  Peppermint - not spearmint - flavor and green!  I skipped the rolling-pin and cookie-cutter step, opting to roll out balls of dough and flatten them with the bottom of a drinking glass.


I've been making Nutella ice cream that's simply a 1:1 ratio of Nutella and evaporated milk.  It. Is. Heavenly.  Especially straight out of the ice cream maker - sumptuous and silky, almost gelato-like.  So good.  Anyhow, I looked today for more recipes using evaporated milk, but found a ton that use sweetened condensed milk in place of the usual egg custard base.  And when I found a mint chip one, I couldn't resist.  My initial lick off the dasher was pretty good - we'll see how it freezes up.  I particularly love the stracciatella technique - drizzling melted chocolate into the ice cream maker in the last stage of freezing.  It produces softer chocolate flakes instead of hard chips.  If I did it again (and I likely will), I will use chocolate thinned out with some shortening to produce an even softer chocolate flake - aiming for the effect I've tasted in ice creams like Graeter's.  Meanwhile, I'll happily make quick work of this batch. :)


The cookie photo showcases one of my new set of dishes.  It had been almost 13 years since we got our last set of dishes (for our wedding), and they were starting to look a little dated.  Figured a big move would be a good excuse to get a new set, found a group at Pier 1 that I liked, in a variety of patterns, so they coordinate but aren't matchy-matchy.  We have small plates and bowls in the zebra pattern you see, plus plates and bowls in four other similar patterns.  They went on clearance last week, and living on an island, I've found it's important to gobble things up when I can - they might not be there later, and it's not like we can drive to many other stores...


20 November 2011

Chex Mix, Hawaii-Style

So I passed by some Crispix mix in a store a few weeks ago that had furikake in it. (a Japanese seasoning for steamed rice that has sugar, salt, sesame, and seaweed in it - don't turn up your nose until you try it, it's good!)  I love love love a good chex Mix, but was unwilling to pay the confiscatory price they were asking, so I started searching for recipes and found this and this.

I adapted the recipes to what I had and scaled it down to one pan (and the popcorn, while I'm always game for popcorn, just seemed to be too much of a textural contrast with the cereals - maybe on its own, it could be good).  Also, I just can't see dumping an entire bottle of furikake in.  Maybe it's my mainlander tastes, but I think that much furikake would make it taste very one-note.  I put in less than half and I thought that was plenty.  You could still get the sweet/savory/salty thing without any one flavor domineering.  I didn't have Tabasco, so I substituted in a few shakes of cayenne pepper - and could probably have used a little more.  I don't like nuts in my chex mix, so I swapped in more cereal for them.  And when I poured the sugar goo into the pan, it seemed like way too much, so I wound up adding at least another cup of (combined) cereal and pretzels.  I also think it wound up a little greasy, so I cut back on the oil just a bit.  And don't use the furikake that has bonito flakes in it.  Unless you like fishy chex mix.

Furikake Chex Mix

6 c. cereal: Corn Chex, Rice Chex, Honeycomb 
(I like 3c. Rice Chex, 1c. Corn Chex, and 2c. Honeycomb)
1 c. pretzels (I used pretzel goldfish, because, hey, they're cute)

0.5 c. butter
1/4 c. + 2 T. sugar
1/4 c. + 2 T. corn syrup
1.5 T. soy sauce (shoyu here in the islands)
1 T. worcestershire sauce
1/4 c. oil
Dash red pepper
2-3 T. furikake

Line a large roasting pan with foil.  You'll be glad you did this, because the syrup gets super-sticky as it bakes.  Heat oven to 250 degF.  Pour cereals and pretzels into pan.

In a small saucepan, melt butter over medium-low heat and stir in sugar until it dissolves.  Add corn syrup, soy sauce, worcestershire sauce, oil, and pepper.  Pour syrup over cereal in pan and stir well to coat.

Bake for about an hour - maybe longer - until it is crunchy.  Stir every 10 minutes.  Stir in the furikake after 20 minutes.  If you don't have furikake, you can do what others have suggested and use a mix of toasted sesame seeds and a little salt.

Make sure you store this quickly in an airtight container or bag because it sucks up moisture and gets sticky quickly, even if you don't live in the middle of an ocean.

Very ono.  And remarkably addictive.

15 November 2011

Adventures in Shave Ice II


Went back up to Hale'iwa today and tried Aoki's Shave Ice - which was not-crowded and right across a gravel lot from the always-crowded Matsumoto.  

First, they weren't crowded with tourists.  Which we aren't any more. :)
Second, they had more pleasant seating out front.  And just seemed cleaner than Matsumoto.
Third, they had some interesting flavors - including Blue Hawaii, which might be one of my top-5s now: coconut, pineapple, vanilla, and blue.  That and the ubiquitous lilikoi, the standard by which I will judge the island's shave ice.  I am also looking forward to trying the coffee, cream soda, and butterscotch syrups.


They were a little weak on the syrup, which is sometimes fine - because the sugar crash after Matsumoto can be rather unpleasant.  And they have a darling little antique cash register on the back counter.  And a penny-squisher.  Word.


28 October 2011

Adventures in Shave Ice


So I think my newest goal is to make a thorough investigation of the island’s shave ice and determine which one, truly, serves the best. 


Made a visit to Matsumoto’s up in Haleiwa with a friend earlier this week, and while it’s popular and very tasty, it’s also always crowded with tourists, the benches outside smell like garbage, and the staff is hit-or-miss on friendliness.  I ordered a combination of lilikoi (passionfruit – always present on my shave ice), coconut cream, and white cake.  The last two flavors were virtually indistinguishable. 


At Matsumoto’s, you can get regular ol’ shave ice (not a snowcone – it’s much finer, like real snow, and are almost always formed into grapefruit-sized portions.  But you can also have them put ice cream under your ice.  Or sweet azuki beans under your ice.  Or both ice cream and beans.  I tried the beans once.  Once was plenty.  No beans in my shave ice any more – no ice cream, either.  Just pure ice.  Almost everyone in line was getting sweetened condensed milk poured on top.  Not only does it look weird, I’m just dubious about the fruity-ice-dairy combo.  I don’t adore sherbet, barely tolerate ice cream sodas, and am pretty sure I don’t want ice cream at the bottom of my shave ice.  But, others have told me it’s delicious, so perhaps I need to give it a try, if nothing else but to say I have (see also: beans).


There are many other shave ice purveyors on O’ahu, however, and it’s time to start discovering them.


Meanwhile, I am rediscovering my home ice-shaver!  This is one of those gifts I wasn’t too sure I really needed or wanted, but turned out to be pleasant surprises (see also: yogurt-maker).  Anyhow, with milk fetching confiscatory prices in Hawai’i, I might not be using my ice cream maker as much as I would like.  Ice, however, is cheap and plentiful.  The syrups, however, can get a little pricey.  I did find a store in Pearl City that sells them for $1.99, but they’re full of high-fructose corn syrup and preservatives (something I’m not too Michael-Pollan about, but if I can avoid them, super).  Surely I can make my own. So I got on the google-box and started looking for snow-cone syrup recipes.  With pennies for the cost of the sugar and Kool-Aid on sale for 10 cents a packet, this beats the supermarket syrups by a long shot!  And it’s crazy-easy.  I cranked out 5 batches in just under 20 minutes, all for less than the price of one commercial syrup bottle.  I’ve been a fan of crushed and shaved ice from the days of my Snoopy Sno-Cone Machine (which produced just a Dixie cup of shaved ice after minutes of hand-cranking), so I’m easily satisfied by a dessert of a bowl of snow flavored with a little sugar syrup.

Shave Ice Syrup

¾ c. water
¾ c. sugar
1 packet Kool-Aid (unsweetened); 1 t. extract; half a dram bottle of flavoring

Boil the water and sugar until the sugar dissolves. Remove from heat.  Add flavoring and stir.  Cool your syrups in the refrigerator, then pour over shaved ice. Store in the refrigerator. (Chilled syrups don’t melt the ice so quickly, anyhow.)

It’s essentially just flavored simple syrup.  And this stuff is sweet and flavorful – which it needs to be, so the ice doesn’t water it down too much.

For this go-round, I made Grape, Strawberry, and Pink Lemonade with Kool-Aid; Vanilla and Coconut with extracts.  I used my clear vanilla for this, but added a drop of neon blue food coloring to distinguish it from coconut, which I tinted bright yellow-green.


Chemistry? No, sugar syrup!

Next up: Almond, Cherry, Pineapple, and my favorite, Lilikoi (as soon as I can figure out the proportions with my pre-sweetened passionfruit drink mix).  Later: Maple, Banana, Lime, maybe a vanilla-peppermint or an Earl Grey syrup?  Lemon-elderflower would be awesome, if only we had an Ikea here for the elderflower.  Maybe someday I can move behind the candy-like esters of artificial flavoring and try reducing fruit juices into syrups, but – oddly – that has an air of the inauthentic.   Plus, those would surely taste cooked.  All the more reason to keep with the Kool-Aid and the extracts. :)

My most recent combo: vanilla-coconut

Adventures in Barbecue


I only recently began ordering pulled pork (usually at those barbecue places that bring you otherwise plain pork and allow you to sauce it yourself) and I sure don’t like that nasty brown smoky-sweet rubbish that is commercial barbecue sauce.  Ugh.  But, I can tolerate the sauces at those barbecue joints that are more tomato-tangy than anything.  So, having found a recipe for slow-cooked pulled pork that uses only root beer and pork, I decided to give it a go.  But instead of root beer, I thought the honeysuckle-sweet taste of Dr. Pepper would complement pork pretty well.  I was right!  This was SO GOOD!  Stop what you’re doing right now and go make some!  You won’t be sorry.

Dr. Pepper Pulled Pork
with
Dr. Pepper Barbecue Sauce

Dr. Pepper Pulled Pork
2-4 lb. pork shoulder (sometimes called shoulder butt roast or Boston butt *)
1 2-L bottle Dr. Pepper

Put the pork in the slow cooker, pour in enough Dr. Pepper to come up about 2/3 the depth of the roast (about half the bottle – save 2 c. for the sauce).  Season with salt and pepper, if you like.  Cover and cook on low for 8h.

[While the pork cooks, make your sauce.]

Remove the pork from the slow cooker and drain. Shred pork roast with forks.  Top with sauce and enjoy!  (You can put it on bread, too, if you want a sandwich)

* Don’t waste your money on pork tenderloin or some other pricey cut – a cheapy-cheap bone-in pork shoulder with a little marbling of fat is perfect.  It’ll be falling off the bone after you get done with it.


Dr. Pepper Barbecue Sauce
2 c. Dr. Pepper
1 15-oz can tomato sauce
3 T. dry minced onion
1/3 c. vinegar
¼ c. honey
¼ c. brown sugar
½ t. Penzeys Northwoods seasoning
Salt and pepper to taste

Combine soda, tomato sauce, and onion in a saucepan; bring to a simmer.  Add the rest of the ingredients.  Stir and simmer on medium heat, uncovered, 1 hour or until sauce has thickened and reduced to about 2 cups.


+
 
=


13 August 2011

Summer Projects: Cooking

This summer, I'm giving myself some Iron-chef-style personal challenges with the things that are in my pantry (seriously, where did all these kidney beans come from??). Recipes I've bookmarked for later:

Red Beans and Rice (it's been hard finding a recipe that doesn't use canned beans when I want to use up dried)
Cookies and Cream Pudding


It's later.
I did not get around to the orange blossom creme brulee or the lilikoi chiffon pie.  I did, however, host two nights of crepes, very successful!  I highly recommend a mixture of ham and swiss for dinner and nutella with amaretto for dessert!

I've already blogged about the gelatin.  The date shakes were... meh. I don't think the dates got adequately pureed, so the whole blend-up just looked like, well, you can imagine.  Blech.

I also added to the mix an orange-blossom shortbread, sort of modeled on this. Cut into flower shapes, brushed with egg wash, and sprinkled with orange sanding sugar, they were good, but I think I will try a different shortbread recipe next time.  The orange blossom was subtle, but fragrant, which was good, because the floral scent can quickly make things taste soapy.

The real win, though? The caramel corn.  It's exquisitely addictive.  I started doing some riffs on the basic recipe, swapping almonds and almond extract to great effect.  It only takes a couple minutes in a standard microwave - you just have to play with the timing, but the best part of the recipe is that it results in caramel corn that is (and stays) crunchy!  Go on, try it.  You can use any kind of popcorn, but the best is stovetop-popped kernels in butter-flavored oil.


03 August 2011

Fun With Gelatin!


More kitchen fun, this time with gelatin.

The basic proportion?  1 Knox envelope, with 2 c. liquid.


Assemble your liquids! Last year, I made americano gelee with unflavored gelatin, espresso, and water. This time, I'm using Shokata (lemon-elderflower soda), leftover Shiraz from last night's dinner (I added a couple teaspoons of sugar to the hot wine to take a bit of the edge off), and a passionfruit cordial I found in the clearance rack at my international market (about 3/4 c. diluted to 2 c.).


I used Knox envelopes, since that's what I had on hand, but you could use gelatin sheets, too, whatever the equivalent is. In 1 c. of cool liquid, I bloomed the gelatin by sprinkling the powder on top.


Meanwhile, I stuck the other 1 c. of liquid in the microwave to boil it. I added the boiling liquid to the bloomed gelatin and stirred more than I probably needed to, to make sure it was completely dissolved.


Then, into the serving dishes! I put the wine in wine glasses, naturally. The Shokata went into martini glasses - never seen gelatin so elegant! And the passionfruit got divided into four Japanese teacups.


And into the fridge! I let these gel overnight. It takes a few hours.


The results?
The best was the gelatinized Shokata.  Passionfruit was a second, but I might have liked it diluted with seltzer water instead of still.  The Shiraz was unconsumable.  Way too strong - should have made much smaller portions and sweetened it further - maybe with some fruit juice and fruit as a jiggly riff on sangria...

12 July 2011

Summer Cooking I

So I had a burst of industry today. Surveyed our pantry, looked up some recipes, and went to the grocery store and came home with all kinds of fresh food for the week. I do love summer produce! Bought blueberries, mango, broccoli, cauliflower, onions, potatoes, bananas (both green and ripe - some for eating, some for baking), plums, green onions, peaches, plus some tilapia, ham, and sausage. My goals this week are to use up the following from the pantry:

macadamia nuts
beans (we have a ridiculous number of beans, canned and dried, right now)
white chocolate chips
double cream and apricot jam
popcorn
couscous


Well, the mac nuts and white chocolate chips simply begged for cookies. I also ran across a mac-nut-crusted tilapia recipe I hadn't had in a while - so that was put on the dinner list. When I opened the freezer, however, to pull out the mac nuts, I found I barely had enough to use for the fish, much less the cookies. Fail. But, I have a huge bag of walnuts in the freezer, so I quickly fast-tracked them to the list. I've hardly ever used walnuts for anything, really - this is perhaps the first time I'd ever purchased them, for a Lebanese pastry with orange-flower-water called ma'amoul. So I substituted walnuts for macadamias in my usual cookie recipe, and the results seem favorable!

White-Chocolate Walnut Cookies
(adapted from this)

1/2 c. butter, softened
1/2 c. shortening
3/4 c. brown sugar
1/2 c. white sugar
2 eggs
1/2 t. vanilla
1/2 t. almond extract
2 1/2 c. flour
1 t. baking soda
1/2 t. salt
2 c. chopped walnuts (or macadamias, if you're a purist!)
2 c. white chocolate chips

Cream together butter, shortening, and sugars. Beat in eggs. Add vanilla and almond extracts. Combine flour with baking soda and salt, then stir into butter mixture. Add nuts and chips. Drop by 2 tablespoons [the original recipe calls for making cookies by the teaspoon. Get serious, people! A chocolate chip takes up most of a teaspoon. I used my 2-tablespoon scoop, thankyouverymuch.] onto parchment-lined cookie sheets. Bake at 350 degF for about 12-14 min until tops are tanned.


I often can justify popcorn as dinner (with some Dr. Pepper to chase it down - mmmm!), but I wanted to use up some for more legitimate reasons. I happened across this recipe in my allrecipes.com box, and decided to give it a go. SO. INCREDIBLY. GOOD. Crunchy, not sticky (even in FL humidity, though I'll be honest, it hasn't lingered too long...), and the possibilities for modification (e.g. add nuts, tweak the extracts, etc etc) abound. Will definitely be making more of this stuff this summer.

Caramel Corn
(adapted from this)

1/3 c. popcorn
2 T. popcorn oil (you can use any vegetable oil, but I like the faux-buttery flavor of the bright-yellow stuff)

Pop popcorn(1), pick out any unpopped kernels, and set aside in a large microwave-safe bowl. I sprinkle mine with a little popcorn salt, to give more of the salty-sweet dichotomy we all know I love.

In a smaller microwave-safe bowl (but not too small), combine 1/2 c. brown sugar, 1/4 c. butter, 2 T. corn syrup, and 1/4 t. salt. Microwave for 1 min. Stir, and microwave an additional 1.5 min. Add 1/2 t. vanilla and 1/4 t. baking soda.

Pour caramel mixture over corn in larger bowl and stir. Microwave 1 minute, stir. Microwave 1 minute, stir. If you have a large-wattage microwave, it'll probably be done at this point. If you have a smaller-wattage microwave, cook up to a minute more. Pour out onto parchment or a nonstick baking sheet to cool.

Note: be careful with this stuff. That sugar/butter mixture is napalm-hot, no joke. You'll see when you add the vanilla that it's hot enough for the extract to boil. Plus, it's sticky, and even a little drop on your fingers is going to hurt. Use a big spoon to stir the popcorn - you'll be glad you did.

Next up: Maple-pecan popcorn with maple syrup and toasted pecans; almond popcorn with almond extract and toasted almonds.


(1) Look, you can use microwave popcorn, but it's not going to be the same. Ditch the microwave bags and buy kernels. You won't spend that much more time on it, and stovetop-popped corn tastes way better. In a large covered pot, heat 2 T. oil on medium heat and add 3 kernels. Cover, and wait until you hear those test kernels pop. Add the remaining 1/3 c. kernels, and cook, shaking occasionally, until popping slows. Remove from heat, add salt, and never go back to microwave popcorn ever again.


I also needed to use some double cream that's been waiting patiently in my refrigerator. A lovely breakfast is some yogurt, some fresh fruit, and a scone topped with cream and apricot jam. So I needed some scones. I made some from a mix, but they came out flatter than roofing tiles. Back to my usual recipe:

Scones
(adapted from this)

1 c. sour cream
1 t. baking soda
4 c. flour
2 t. baking powder
1/4 t. cream of tartar
1 t. salt
1 c. butter
1 c. sugar
1 egg

Mix sour cream and baking soda in a bowl and set aside.
Mix flour, baking powder, cream of tartar, and salt in another bowl and set aside.
Cream together butter and sugar. Add sour cream mixture and egg and blend thoroughly. Fold into flour mixture, taking care not to overmix. Turn onto a floured surface and knead lightly. Roll into a rectangle and cut 12 triangle wedges from it, or else make 12 rounds. Bake at 350 degF for 12-15 minutes on parchment, or until edges begin to tan.


Not my favorite scones, but they're serviceable.

Quite the output for an afternoon. And it's not even time to start dinner yet!

16 August 2010

Kitchen (Mis)Adventures


Who has two thumbs and fails at pocket-pie making? That's right, this girl.

Like most misadventures, it all started out fine. I got some empenada discs at the grocery store, intending to fill them with jam for a sort of riff on pop-tarts. You know, a quick on-the-road breakfast, what with school starting soon and all. So I plopped a tablespoon (okay, more like two) of my homemade blackberry jam in the center, folded, crimped, buttered, and sugared. Cute, right?


Halfway through, I caught a glimpse of my honey bottle out of the corner of my eye and thought, "brilliant!" so I made a couple blackberry-honey pies, and once the blackberry jam jar was exhausted, made a couple honey-only ones. (Thought about maple syrup - maybe another time)

But then, in a flash of blinding stupidity, I forgot to prick any vent holes in the tops. So, I had filling containment breaches all over the place.


Including the honey. Which you can see, in this picture, is now permanently baked onto my pan, I suspect. I was getting ready to wax all poetic about parchment and how I bake nearly everything on parchment and how wonderful it is. Alas, it was no match for 400-degree honey hell-bent on oozing right out of my pies.


Made some fresh banana ice cream, too, but it didn't freeze quite as firm as it usually does.


Maybe this string of fail is just a sign it's time to get out of the kitchen and into the office to start preparations for the school year, which - for teachers - begins on Wednesday...


UPDATE:

The kitchen has been redeemed by lunch. Made myself a lunch of vegetables and fruit only, after binging yesterday in the Publix produce section (I love summer produce!). Romaine salad, roasted broccoli, raw carrots, thomcord grapes (that grape-jelly flavor (1) but seedless), and two kinds of zucchini soup - and I am happily stuffed.

I had been looking for a creamy zucchini soup recipe to re-create a saffron-courgette soup I had last summer in the UK. Found this recipe on allrecipes.com, but the curry sounded good, too, so I split the recipe into two: half curry, half saffron. The hand-blender gave it the creamy texture without the need for cream (and I marvel at the ability of curry - well, turmeric, really - to render everything in a 10-meter radius yellow, including the lower 4cm of my hand blender...). When I do it again, I'll add more saffron, but that sure makes for a pricey soup. The curry is equally good, actually, probably better. Garnish with a drizzle of cream, toasted croutons, and maybe a grating of fresh zucchini. Got a garden full of zucchini (and can't stomach any more zucchini bread, plus the neighbors are onto you and the bags of zucchini left on their doorsteps under the cover of darkness)? Give this a go.

Creamy Curry Zucchini Soup

2 T. olive oil
1 large (or two small) onions, halved and thinly sliced
1 T. curry powder (go on, kick it up a notch - you won't be sorry)
4 zucchini, halved lengthwise and sliced
4 c. chicken stock (2)
salt and pepper to taste

Heat oil in a large pot over medium-high heat. Add onions and curry powder. Stir until softened. Add zucchini slices and cook until zucchini is tender. Add stock, cover, reduce heat to low, and simmer 15-20 min. Use a hand blender, or transfer in batches to blender (make sure you vent the lid!), to puree soup until smooth.

1 The wine-snob term for this is "foxy" :)
2 I don't see why vegetarians couldn't substitute vegetable stock here

15 August 2010

More Kitchen Adventures


I'm not sure why it took me so long to get on the unflavored gelatin wagon. Turn any liquid into Jell-o?? I'm in!


Americano Jelly

2 envelopes unflavored gelatin (could use sheets, too, I imagine, but the Knox stuff is available everywhere)
1 c. cool water
1 c. hot espresso

Brew some espresso (or just make some strong coffee).

Meanwhile, soften gelatin over cool water. (I just want to poke it!)


Line a 8-inch square pan with plastic wrap.


Mix hot espresso into gelatin mixture, and stir until gelatin is completely dissolved (4-5 min). Add some sugar, to taste. Or don't. Or substitute a little cool milk for some of the water (a latte jelly!). Or don't. It's your jelly - do what you like!

Pour into pan! Refrigerate until set! Cut into cubes!


Jelly cubes! Look how cute!


Cubes at the bottom of my iced coffee, all boba-style. Word.


Tonight's dinner: Pizza Bianca with olive oil, fresh basil, rosemary, parmesan, mozzarella, sun-dried tomatoes, and prosciutto. The crust was AMAZING. Beats the socks off the Publix dough we usually use and doesn't take much work - just time.

Earlier tonight: Cocoa and Sea-Salt Shortbreads again, but with darker cocoa (still no cacao nibs). Inky-black and highly addictive - even more so than the first batch.

Later tonight: Fresh yogurt, and some homemade pop-tarts (made from this summer's blackberry jam and empenada dough.