21 February 2012

President's Day

Brian and I both had the day off today, which was good, because he managed to get tickets to a taping of "Live With Kelly" (formerly Regis & Kelly).  Yeah yeah, I know, a taping of a live show...?  But if they were to actually show it live from Hawaii, it would have to start at 4am.  Anyhow, it was at the new Disney resort over at Ko Olina, which we've driven past but never been to.  It was windy and sunny day - and I forgot the sunscreen I specifically put out on the kitchen counter... I don't seem too burned, at least yet.  The episode airs Wednesday, with Carrie-Ann Inaba, Patricia Heaton, and Carson Kressly.  And a couple who won a wedding here in Hawaii with 30 friends and family - and quite possibly the least enthused to have won such a prize.  Very curious.  Anyhow.

 Aulani resort
 Paddle dancers
 Kelly and Carrie-Ann
 With Patricia
With Carson


We got home and I did some cooking, including some Butter Mochi.  The reviews of a recipe suggested making it in cupcake pans because the outside part is the best part.  And so I made miniature mochi bites!   

Mochi requires rice flour like this Mochiko:

I took about half the mixture and blended a few spoonsful of cocoa for cocoa-haupia-style mochi.

Half the recipe made four pans of mini-muffin-shaped mochi bites. 

They're reasonably good - they have that unique mochi chewiness, but with the richness of eggs and butter. I've been told they will taste better on day 2.  So, I'll try to report back. :)

20 February 2012

Mint Chip Goodness


I've been enjoying a kitchen renaissance lately, with my luxurious free time.  Good for the soul, bad for the waistline...

Last week, I made some mint-chip cookies (sorry for the lame photo - I didn't take any until I only had one left. :) Forgive also the crummy photo quality - the kitchen's a wreck, and I want to get back into the habit of posting.)  Anyhow, it was everything I love about mint-chip ice cream, my favorite ice cream flavor, in cookie form!  Peppermint - not spearmint - flavor and green!  I skipped the rolling-pin and cookie-cutter step, opting to roll out balls of dough and flatten them with the bottom of a drinking glass.


I've been making Nutella ice cream that's simply a 1:1 ratio of Nutella and evaporated milk.  It. Is. Heavenly.  Especially straight out of the ice cream maker - sumptuous and silky, almost gelato-like.  So good.  Anyhow, I looked today for more recipes using evaporated milk, but found a ton that use sweetened condensed milk in place of the usual egg custard base.  And when I found a mint chip one, I couldn't resist.  My initial lick off the dasher was pretty good - we'll see how it freezes up.  I particularly love the stracciatella technique - drizzling melted chocolate into the ice cream maker in the last stage of freezing.  It produces softer chocolate flakes instead of hard chips.  If I did it again (and I likely will), I will use chocolate thinned out with some shortening to produce an even softer chocolate flake - aiming for the effect I've tasted in ice creams like Graeter's.  Meanwhile, I'll happily make quick work of this batch. :)


The cookie photo showcases one of my new set of dishes.  It had been almost 13 years since we got our last set of dishes (for our wedding), and they were starting to look a little dated.  Figured a big move would be a good excuse to get a new set, found a group at Pier 1 that I liked, in a variety of patterns, so they coordinate but aren't matchy-matchy.  We have small plates and bowls in the zebra pattern you see, plus plates and bowls in four other similar patterns.  They went on clearance last week, and living on an island, I've found it's important to gobble things up when I can - they might not be there later, and it's not like we can drive to many other stores...


19 February 2012

Hawaii Delights


Had a good grocery outing today.  I think I've become completely desensitized to Hawaii food prices.  The numbers that used to give me pause no longer do.  I passed up some local lilikoi butter - but I might wait until I make some headway on my apricot jam, with some scones I hope to make later this week.  I'd like to go to the Whole Foods here and see if they have double cream.  Maybe I should reserve judgment on grocery prices until I see what that stuff commands!

One thing I see in the store often is this stuff called Butter Mochi.  I have been tempted on the last few outings, but can't quite justify the price for something I'm not sure I'll like.  I think I will.  I like regular mochi, which some think has a wonky texture, so the addition of butter can't be much more than gilding the lily.  But, still.  Anyhow, the rice flour that's used to make mochi is not so pricey, so I bought a box and came home and researched some recipes.  Found one that I'm looking forward to trying this week!  I might make half as directed and the other half with a little cocoa blended in for a bit of a Ted's chocolate-haupia pie riff. I shall report back!

The rainy season seems to have returned.  Right after we arrived, it seemed like we had gentle rain showers every evening and morning, sometimes intermittently throughout the day. Rainbows too!  But that seemed to stop in January.  We've been getting more showers again in the evenings - including a heavy one right now.  Friday morning, I left the house in a dreary rain, and halfway on the way into town, the sun broke free of the clouds, as if summoned by the David Crowder song that was on my ipod at the time.  It was one of those mornings in which I just couldn't believe I get to live here.  Unspeakably beautiful.  And I get to experience it. Every. Day.  I am so incredibly grateful to get to be a part of it, even as merely a witness - to be a participant in the glory of God's creation here.  It would go on being spectacular, even if nobody is here to see it.  But surely it's all magnified somehow, by someone who notices it.  

And, you know, maybe that can be said of people, too.  Something is catalyzed when another takes notice of someone's magnificence.  May we all have such a catalyst, or else be that catalyst.

Peace and love, friends.


24 November 2011

Craftings: Tie Bracelets

So I had a ton of tie ends (the skinny tails), left over from making a tie skirt1 a couple years ago.  I figured I could put them to good use, and finally decided I could make little cuff bracelets out of them and some cute vintage buttons I inherited from my mom and grandmother's sewing collection.

I measured them on my wrist, folded over the not-pointy end and stiched it closed.  Matched a button to each tie, then sewed a buttonhole on the pointy end.  Boy, it's been a while since I machine-stitched (okay, any stitch) a buttonhole, and wow did I really suck at it.  This is one of the later (and better) ones.  Ugh.

On my wrist!

A fleet of them!  (I have three others that aren't pictured because I did them on an earlier night and they were already in my jewelry drawer)

I made a couple double-length ones that could be chokers, or doubled up on the wrist.  Doesn't this one look so academic? :)


1 Todd Oldham taught me how, in, like 1993.

23 November 2011

Craftings: Cardboard Star Wreath


So I've been on quite the crafting binges lately.  And a lot of them have involved reuse of otherwise unused objects.  Partly because of thrift, and partly because we live on an island now, and I'm a lot more sensitive to our waste these days.  Not that I wasn't before, but when you live on a very small pinpoint in the middle of the sea from which our garbage gets shipped, anything I can do to recycle or upcycle seems prudent.  Anyhow, I saw a how-to online for cardboard 3-D stars (which will be perfect for Christmas cards later this year - we'd already recycled a ton we'd saved before we moved).  So I took a cereal box and pizza box that otherwise would have gone in the recycling bin, grabbed my x-acto knife, and got to work!


Then I painted my stars a silvery sage green, plus an extra pearly coat on the smaller stars.


Some I left cardboard-colored, scored, and folded them into 3-dimensional stars. 


Then I grabbed a nasty wire hanger (you know, the cheapy ones that your dry-cleaning comes back on - blech), fashioned it into a circle, bent the top back into a loop, and then hot-glued the crap out of it on the back.


Stuck the 3-d stars on top of the flat green ones, making sure to gob them with hot glue wherever they touched the stars under them.


Close-up of the bottom.


On the door!  There's a sheer shimmery ribbon that matches it quite well that's looped around the top where the hook is - but I may take it off.  Haven't decided.


20 November 2011

Chex Mix, Hawaii-Style

So I passed by some Crispix mix in a store a few weeks ago that had furikake in it. (a Japanese seasoning for steamed rice that has sugar, salt, sesame, and seaweed in it - don't turn up your nose until you try it, it's good!)  I love love love a good chex Mix, but was unwilling to pay the confiscatory price they were asking, so I started searching for recipes and found this and this.

I adapted the recipes to what I had and scaled it down to one pan (and the popcorn, while I'm always game for popcorn, just seemed to be too much of a textural contrast with the cereals - maybe on its own, it could be good).  Also, I just can't see dumping an entire bottle of furikake in.  Maybe it's my mainlander tastes, but I think that much furikake would make it taste very one-note.  I put in less than half and I thought that was plenty.  You could still get the sweet/savory/salty thing without any one flavor domineering.  I didn't have Tabasco, so I substituted in a few shakes of cayenne pepper - and could probably have used a little more.  I don't like nuts in my chex mix, so I swapped in more cereal for them.  And when I poured the sugar goo into the pan, it seemed like way too much, so I wound up adding at least another cup of (combined) cereal and pretzels.  I also think it wound up a little greasy, so I cut back on the oil just a bit.  And don't use the furikake that has bonito flakes in it.  Unless you like fishy chex mix.

Furikake Chex Mix

6 c. cereal: Corn Chex, Rice Chex, Honeycomb 
(I like 3c. Rice Chex, 1c. Corn Chex, and 2c. Honeycomb)
1 c. pretzels (I used pretzel goldfish, because, hey, they're cute)

0.5 c. butter
1/4 c. + 2 T. sugar
1/4 c. + 2 T. corn syrup
1.5 T. soy sauce (shoyu here in the islands)
1 T. worcestershire sauce
1/4 c. oil
Dash red pepper
2-3 T. furikake

Line a large roasting pan with foil.  You'll be glad you did this, because the syrup gets super-sticky as it bakes.  Heat oven to 250 degF.  Pour cereals and pretzels into pan.

In a small saucepan, melt butter over medium-low heat and stir in sugar until it dissolves.  Add corn syrup, soy sauce, worcestershire sauce, oil, and pepper.  Pour syrup over cereal in pan and stir well to coat.

Bake for about an hour - maybe longer - until it is crunchy.  Stir every 10 minutes.  Stir in the furikake after 20 minutes.  If you don't have furikake, you can do what others have suggested and use a mix of toasted sesame seeds and a little salt.

Make sure you store this quickly in an airtight container or bag because it sucks up moisture and gets sticky quickly, even if you don't live in the middle of an ocean.

Very ono.  And remarkably addictive.

17 November 2011

Craftings: Stained Skirt Reclamation

About a year ago, I bought a lovely basic grey skirt.  Knee-length, goes with lots, fits well.  So you can understand my dismay when, on the second or third wear, I stained it by sitting on a sharpie or pen or something.  Well, I couldn't bring myself to get rid of it, even though there was a big black stain on the caboose, so I set it aside, figuring I could wear it with long jackets or sweaters or something.  Which was maybe once. I mean, I didn't know what exactly I could do to cover it without the covering looking worse than the stain itself, you know?  But I figured I could come up with something when I had more time and ambition.

The original stain.  Mid-project, from underneath. :(

Then, I held a bridal shower which left me with hundreds of surplus buttons.  Perfect!

And unemployment leaves me with plenty of time!  Perfect! (well, perfect for crafting, at least...)

So, I parsed out all they grey, black, and pearly buttons.  Stuck one over the stain, and then started sewing more on, randomly.  And kept sewing - I wanted a thicker covering of buttons at the bottom hem, tapering up towards the waist.

The back, with stain now cleverly hidden.

Things I Underestimated About This Project:

  1. The amount of time required.  I didn't sew each button more than 2 or 3 loops, but each one is individually knotted, and that takes a while.  This was a 3-evening project!  I didn't anticipate it taking more than a night.
  2. The forethought required in achieving a "random" pattern.  It was hard to scatter buttons so that they weren't equidistant from their neighbors!  I had to keep shifting them and adjusting before sewing them down.
  3. The weight of all those added buttons.  This skirt weighs close to a pound now!

Extra buttons sewn into the lining for those I will invariably lose!


My reclaimed skirt!  From the front.

16 November 2011

Craftings: T-Shirt Refashioning

So I've been addicted, in my unemployment, to pinterest, where in a 5-minute span, I can grow my project-list exponentially.  But, I now have time for all the projects I've accumulated for the past seven years!  So I've been doing a lot of crafting and DIY projects.

One recent obsession: refashioning t-shirts into new things.  I'm kicking myself for giving away so much of my clothing before we moved - I could do so much with them now! :(  Well, Goodwill has provided me with some cheap supplies!

I found some directions to make scarves/necklaces out of t-shirt jersey material.  I cut a bunch of strips/loops from t-shirts, stretched them so they roll up on themselves, and assembled.  What fun!


 Made this one because I loved a former colleague's combo of purple and lime she wore one day.

  Cut spirals out of t-shirts.  In retrospect, I'd have made them larger slash used a larger shirt, because this scarf is a little scrawny.


I was concerned that this one plays a little too 80s - but it actually looks kind of cute with a darker kelly green top and white skirt.

  Finger-knit braided bracelets - what a fun (and VERY instant-gratification) technique!.


 Chrysanthemum pin made from sleeve scraps.

  If I were to do this one over I'd have made it shorter and thicker.  But I did dye this one myself, and the pink shows a nice subtle variegation.  I also achieved this pink using black food coloring and boiling water. Pink was the only tone that stuck to the cotton.

  This one's going to a friend. :)

 This one, too. :)

 But this one I'm keeping.  To me, it's very oceany.  And makes good use of a bunch of surplus buttons!  It's a hybrid scarf-necklace (scarflace?  ew, no) made of long loops doubled-up on themselves.  But I've worn it so it cascades a little more.

There are more t-shirt projects coming, as soon as I can get back to a thrift shop! 


15 November 2011

Adventures in Shave Ice II


Went back up to Hale'iwa today and tried Aoki's Shave Ice - which was not-crowded and right across a gravel lot from the always-crowded Matsumoto.  

First, they weren't crowded with tourists.  Which we aren't any more. :)
Second, they had more pleasant seating out front.  And just seemed cleaner than Matsumoto.
Third, they had some interesting flavors - including Blue Hawaii, which might be one of my top-5s now: coconut, pineapple, vanilla, and blue.  That and the ubiquitous lilikoi, the standard by which I will judge the island's shave ice.  I am also looking forward to trying the coffee, cream soda, and butterscotch syrups.


They were a little weak on the syrup, which is sometimes fine - because the sugar crash after Matsumoto can be rather unpleasant.  And they have a darling little antique cash register on the back counter.  And a penny-squisher.  Word.


31 October 2011

Thoughts on Arriving

So we've been "home" for about two weeks now (staying in a hotel for the first ten days doesn't count), and we just about have everything situated in the house.  The kitchen was the first room to be settled.  The guest bedroom is all set up! (Book your vacations now!) The office is almost ready.  The bathrooms done. Our closet still needs some organizing, and everything could use a good vacuuming.  Pretty much everything has found its space  Even though it's remarkably foreign - more than one might expect - it's becoming more like home every day.  Now that the house is more or less under control, it's time to get out and start exploring.  Because until I find a job, my world is incredibly tiny!  

We've been to O'ahu several times, but upon arrival, nothing seemed terrifically familiar.  Partly because my husband usually does the driving when we're here, partly because this has never been my favorite island and we usually just connected here before dashing off to a different island, partly because the roads here are pretty confusing (to say nothing of the street names in a foreign language!), and partly because it's all colored by the we-live-here-now filter.  We're not vacationers, we're residents.  And that changes everything.

A couple people told me, before we left, to beware of island fever - when you just have to get off the island and start to go a little stir crazy.  We spent seven years in central FL, roughly the same land mass and population as here, and I feel like I barely scratched the surface of all the things to do and see there.  Never even made it to Sea World or Gator Land (gasp!).  So, to the island-fever folks, if you have run out of things to do on a gorgeous tropical island of a million people, clearly you are not looking hard enough.

When I'm not arranging the house1, I've been doing loads of comparison-shopping.  Trying to figure out what reasonable prices are for things around here (e.g. where milk does not cost $7 a gallon or other confiscatory pricing), and I'm surprised to see that gas pricing is virtually uniform throughout the island, even right at the airport.  I meant to take a photo of "what $100 buys in Hawaii" upon return from shopping yesterday afternoon, but already put the perishables in the fridge before I thought to - and didn't want to pull it back out.  So, some other time.

Our neighborhood is nice - loads of families, which means we probably don't have enough candy for tonight!  We have air-conditioning in some rooms, but the trade winds and our elevation (right at 1000 feet) make for nice circulation through the house if we throw open our windows.  Especially our front door, which has a separate screen door in front for just that thing.  Haven't had a screened front door since my parents' house! Anyhow, since I throw open the windows every morning, I find that there's so much sound!  Cars driving down the street, dogs barking, people's conversations - I have to be careful about singing along to my ipod. :)  Such a difference from Florida, where one goes from a sealed air-conditioned house to a sealed air-conditioned car. It's amazing how much goes on that you hear when your windows are open!  I know that's sort of a captain-obvious observation, but it just shows how insulated our FL existence was.  I suppose it's largely good - I sometimes get easily freaked-out by unidentifiable noises, but leaving the windows open and spending so much time in our house (again, a strange benefit of not having a job) as well as a much smaller house, I feel a lot more secure here than I have in previous homes.  Maybe that's just a function of my own growth in general.  Another topic for another time.

Other topics for other times: the process of finding a church, what it's like to be "on sabbatical" for the first time in my life, and what new things we've learned through each of our moves.

Not sure what I will wind up doing for work, but am patiently waiting on submitted resumes and sending new ones out when I see something interesting.  What I want to do is tackle my projects list and get to reading.  In time.

I love that we have both mountains and ocean again.


And because we're just on the other side of the Ko'olau mountain range and the wet windward side, we get brief little showers virtually every day, as well as rainbows virtually every day.  But the rain is so gentle, and it spares us from running the sprinklers on the yard.


1 I distinctly remember being peeved four years ago when we moved into the home we built and lamenting that all my school load was robbing me of the ability to enjoy the setting-up-the-house time.  That's been redeemed - I don't have anything to do now besides that here!


28 October 2011

Adventures in Shave Ice


So I think my newest goal is to make a thorough investigation of the island’s shave ice and determine which one, truly, serves the best. 


Made a visit to Matsumoto’s up in Haleiwa with a friend earlier this week, and while it’s popular and very tasty, it’s also always crowded with tourists, the benches outside smell like garbage, and the staff is hit-or-miss on friendliness.  I ordered a combination of lilikoi (passionfruit – always present on my shave ice), coconut cream, and white cake.  The last two flavors were virtually indistinguishable. 


At Matsumoto’s, you can get regular ol’ shave ice (not a snowcone – it’s much finer, like real snow, and are almost always formed into grapefruit-sized portions.  But you can also have them put ice cream under your ice.  Or sweet azuki beans under your ice.  Or both ice cream and beans.  I tried the beans once.  Once was plenty.  No beans in my shave ice any more – no ice cream, either.  Just pure ice.  Almost everyone in line was getting sweetened condensed milk poured on top.  Not only does it look weird, I’m just dubious about the fruity-ice-dairy combo.  I don’t adore sherbet, barely tolerate ice cream sodas, and am pretty sure I don’t want ice cream at the bottom of my shave ice.  But, others have told me it’s delicious, so perhaps I need to give it a try, if nothing else but to say I have (see also: beans).


There are many other shave ice purveyors on O’ahu, however, and it’s time to start discovering them.


Meanwhile, I am rediscovering my home ice-shaver!  This is one of those gifts I wasn’t too sure I really needed or wanted, but turned out to be pleasant surprises (see also: yogurt-maker).  Anyhow, with milk fetching confiscatory prices in Hawai’i, I might not be using my ice cream maker as much as I would like.  Ice, however, is cheap and plentiful.  The syrups, however, can get a little pricey.  I did find a store in Pearl City that sells them for $1.99, but they’re full of high-fructose corn syrup and preservatives (something I’m not too Michael-Pollan about, but if I can avoid them, super).  Surely I can make my own. So I got on the google-box and started looking for snow-cone syrup recipes.  With pennies for the cost of the sugar and Kool-Aid on sale for 10 cents a packet, this beats the supermarket syrups by a long shot!  And it’s crazy-easy.  I cranked out 5 batches in just under 20 minutes, all for less than the price of one commercial syrup bottle.  I’ve been a fan of crushed and shaved ice from the days of my Snoopy Sno-Cone Machine (which produced just a Dixie cup of shaved ice after minutes of hand-cranking), so I’m easily satisfied by a dessert of a bowl of snow flavored with a little sugar syrup.

Shave Ice Syrup

¾ c. water
¾ c. sugar
1 packet Kool-Aid (unsweetened); 1 t. extract; half a dram bottle of flavoring

Boil the water and sugar until the sugar dissolves. Remove from heat.  Add flavoring and stir.  Cool your syrups in the refrigerator, then pour over shaved ice. Store in the refrigerator. (Chilled syrups don’t melt the ice so quickly, anyhow.)

It’s essentially just flavored simple syrup.  And this stuff is sweet and flavorful – which it needs to be, so the ice doesn’t water it down too much.

For this go-round, I made Grape, Strawberry, and Pink Lemonade with Kool-Aid; Vanilla and Coconut with extracts.  I used my clear vanilla for this, but added a drop of neon blue food coloring to distinguish it from coconut, which I tinted bright yellow-green.


Chemistry? No, sugar syrup!

Next up: Almond, Cherry, Pineapple, and my favorite, Lilikoi (as soon as I can figure out the proportions with my pre-sweetened passionfruit drink mix).  Later: Maple, Banana, Lime, maybe a vanilla-peppermint or an Earl Grey syrup?  Lemon-elderflower would be awesome, if only we had an Ikea here for the elderflower.  Maybe someday I can move behind the candy-like esters of artificial flavoring and try reducing fruit juices into syrups, but – oddly – that has an air of the inauthentic.   Plus, those would surely taste cooked.  All the more reason to keep with the Kool-Aid and the extracts. :)

My most recent combo: vanilla-coconut

Adventures in Barbecue


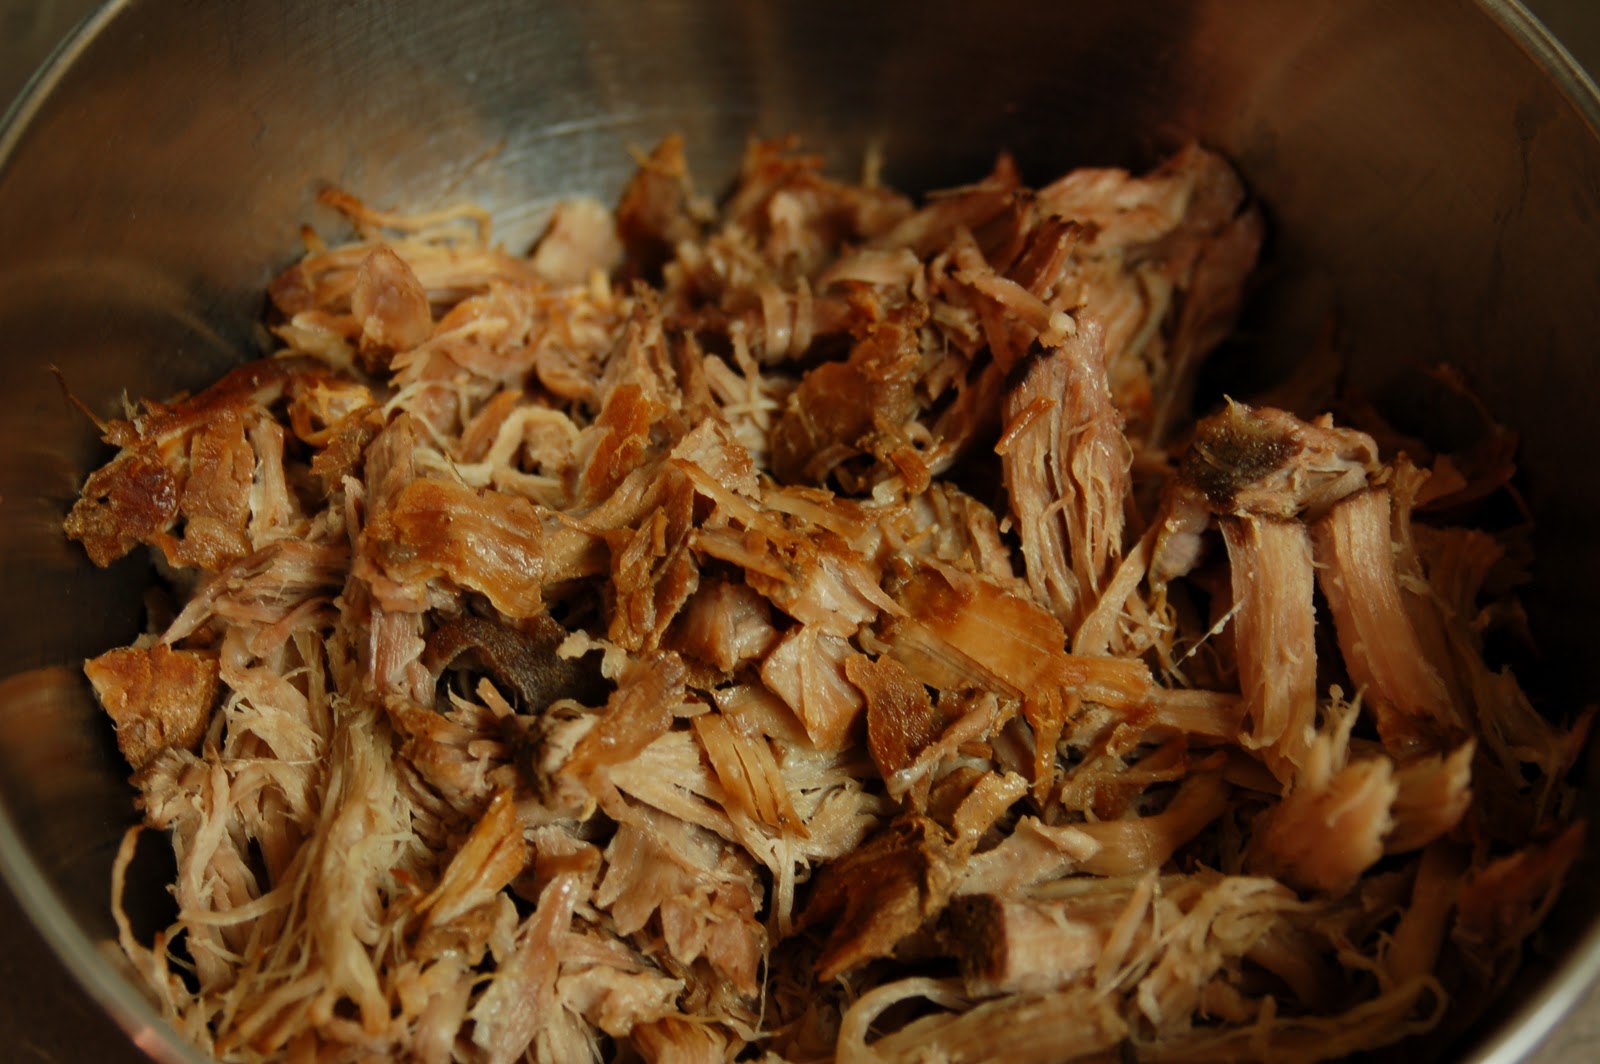
I only recently began ordering pulled pork (usually at those barbecue places that bring you otherwise plain pork and allow you to sauce it yourself) and I sure don’t like that nasty brown smoky-sweet rubbish that is commercial barbecue sauce.  Ugh.  But, I can tolerate the sauces at those barbecue joints that are more tomato-tangy than anything.  So, having found a recipe for slow-cooked pulled pork that uses only root beer and pork, I decided to give it a go.  But instead of root beer, I thought the honeysuckle-sweet taste of Dr. Pepper would complement pork pretty well.  I was right!  This was SO GOOD!  Stop what you’re doing right now and go make some!  You won’t be sorry.

Dr. Pepper Pulled Pork
with
Dr. Pepper Barbecue Sauce

Dr. Pepper Pulled Pork
2-4 lb. pork shoulder (sometimes called shoulder butt roast or Boston butt *)
1 2-L bottle Dr. Pepper

Put the pork in the slow cooker, pour in enough Dr. Pepper to come up about 2/3 the depth of the roast (about half the bottle – save 2 c. for the sauce).  Season with salt and pepper, if you like.  Cover and cook on low for 8h.

[While the pork cooks, make your sauce.]

Remove the pork from the slow cooker and drain. Shred pork roast with forks.  Top with sauce and enjoy!  (You can put it on bread, too, if you want a sandwich)

* Don’t waste your money on pork tenderloin or some other pricey cut – a cheapy-cheap bone-in pork shoulder with a little marbling of fat is perfect.  It’ll be falling off the bone after you get done with it.


Dr. Pepper Barbecue Sauce
2 c. Dr. Pepper
1 15-oz can tomato sauce
3 T. dry minced onion
1/3 c. vinegar
¼ c. honey
¼ c. brown sugar
½ t. Penzeys Northwoods seasoning
Salt and pepper to taste

Combine soda, tomato sauce, and onion in a saucepan; bring to a simmer.  Add the rest of the ingredients.  Stir and simmer on medium heat, uncovered, 1 hour or until sauce has thickened and reduced to about 2 cups.


+
 
=